a) to modify the images which are in the provided PCC file select the imagelist, click on "save" (only possible in registered version) and modify the created PNG file.
b) to create a new image list please create a new image list using the "New Element" button.
Now type in a name, such as "STDBUT"
After pressing button "Clear" you can select the format of the image list, 16*16 or 24*24 pixels.
Now you can use the button "Load Image" to load a PNG file which contains the button images.
Please note:
| • | only PNG files can be loaded. |
| • | the width of the PNG file must be the same as the selected format (16 or 24 pixels) |
| • | the height must be N times the selected with |
| • | It is not possible to append/exchange images lists. If you need to do this you will need to use the graphic application to create a new, higher PNG file. You can load this file after you have used the button "Clear". You can also save the current PNG data (button "Export All" on page "Imaglist" - only possible with registered version), modify it with a good graphics application and load it in. Please note, "MSPaint" is not capable to do it since it removes the transparency attribute. A recommended graphics application is available at www.pl32.com (English and German Version) |
The DLL will select the images using the name and the size. It is best to provide 16*16 and 24*24 image lists under the same name - the engine will use the list which better matches the selected toolbar size.
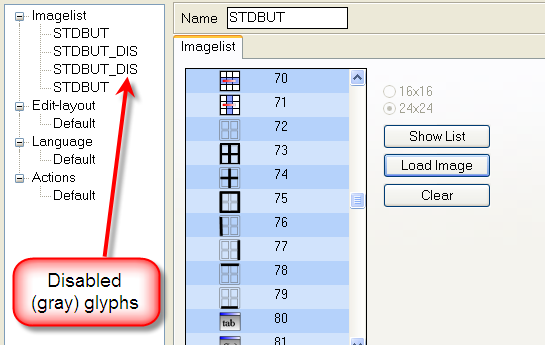
The button "Show List" will open a non modal dialog which displays the current list with the image numbers. This widow will come in handy when you need to compare imagelists.
The EditLayout XML Editor will always display the image list which was opened last on the right hand side. This helps to use the right image index for the button XML tags.
Note: On the page "Imagelist" (only) the registered version of the package editor will display the "Export All" button. With it you can save a PNG file, edit it in an external application and import it again.