In step one we already added the unit WPDevActions7 to the project. This is necessary to let the delphi designer use it.
We now create references for the project at runtime:
a) This variable to reference the action data module has been already created in unit WPDevActions7:
var WPDefAct: TWPDefAct;
b) Create an event handler which is used to tell the actions which WPRichText should be used:
procedure TWPEditor.GetCurrentEditor(Sender: TObject; var wp: TWPCustomRichText);
begin
wp := WPRichText1;
end;
c) Create the datamodule and initialize in Form.OnCreate
procedure TWPEditor.FormCreate(Sender: TObject);
begin
....
WPDefaultActions:= TWPDefaultActions.Create(Self);
WPDefaultActions.WPDefAct.OnGetWPRichText := GetCurrentEditor;
WPRichText1.WPDialogCollection := WPDefaultActions.WPDefAct.WPDialogCollection1;
end;
Now it is possible to populate the first toobar. We have set the property AutoArrangeButtons and AutoPositionControls to false.
On the first toolbar we place one AdvGlowMenuButton an 4 objects of type AdvGlowButton.
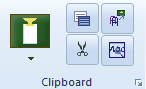
In the first button we use the property "Picture" to load a PNG image symbol. We set its property "Transparent" to true.
We create an OnClick event with this code. We can use the same handler in an PopupMenu to select the mode wpPasteAsText and wpPasteSimplified through the "tag" property 1 and 2.
procedure TWPEditor.PasteButtonClick(Sender: TObject);
begin
WPRichText1.PasteFromClipboard( TWPPasteTextMode((Sender as TComponent).Tag) );
end;
In the properties of the other 4 buttons we assign Actions from the standard action list:
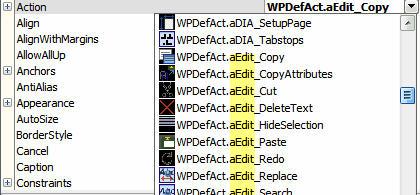
The actions are named with preceding categories to make it easier to locate them.
The property ShowCaption is set to FALSE.