Please also see the demo Create MDI Application (VB.NET) which shows how to use a TToolStrip.
We create a new empty project and add the TextDynamic control. We also add a menu control and a status bar with 4 sub panels.
Private Sub WinForm_Load(ByVal sender As Object, ByVal e As EventArgs)
Me.wpdllInt1.EditorStart( your_name, your_key );
Me.wpdllInt1.SetLayout("buttons.pcc", "")
Me.wpdllInt1.SetEditorMode(EditorMode.wpmodSingleEditor, _
(EditorXMode.wpmodexPDFExport Or (EditorXMode.wpmodexTables _
Or (EditorXMode.wpmodexSpellcheck Or EditorXMode.wpmodexToolbar))),
(EditorGUI.wpguiPanelH1 Or _
(EditorGUI.wpguiHorzScrollBar Or (EditorGUI.wpguiVertScrollBar _
Or EditorGUI.wpguiRuler))), EditorGUI.wpguiDontSet)
End Sub
You can place the code which calls SetDLLName inside the method TForm.New(). The demo does not require this call but if you distribute an application you will need to set a path.

To load the DLL from same directory as the EXE this code is used
Public Sub New()
' Additional Code - look for DLL in same directory as EXE (bin directory)
Me.WpdllInt1.SetDLLName(Application.StartupPath & "\WPTextDLL01.DLL")
' For Windows Form-Designer
InitializeComponent()
End Sub
Note: You will need to add the WPTextDLL01.DLL and the *.PCC file to the installation script manually.
Please don't mix up the engine DLL with the .NET assembly (WPTDynInt.dll or WPTDynInt2.dll). Only the engine DLL must be specified in SetDLLName!
Now we can already load text. Even the PDF export works. (The demo version includes all options - in the full version options such as spellcheck, PDF, reporting are optional). Table support is always included.
To remove certain elements off the toolbar edit the PCC file using the Package File Manager.
a) To update the status bar we add an event handler for OnUpdateGUI.
This event receives useful information about the location inside the text + a number of state flags.
Private Sub wpdllInt1_OnUpdateGUI(ByVal Sender As Object,
ByVal Editor As Integer,
ByVal UpdateFlags As Integer,
ByVal StateFlags As Integer,
ByVal PageNr As Integer,
ByVal PageCount As Integer,
ByVal LineNr As Integer)
Me.stPage.Text = (Convert.ToString(PageNr) & "/"c & Convert.ToString(PageCount))
Me.stLine.Text = ("Line " & Convert.ToString(LineNr))
Me.stIns.Text = IIf(((StateFlags And 2) <> 0), "INS", "")
End Sub
b) We want to use the last panel to display the "hint" of the tool button under the mouse cursor.
The OnShowHint event makes it easy:
Private Sub wpdllInt1_OnShowHint(ByVal Sender As Object,
ByVal X As Integer,
ByVal Y As Integer,
ByVal Hint As String,
ByRef Ignore As Boolean)
Me.stHint.Text = Hint
Ignore = True
End Sub
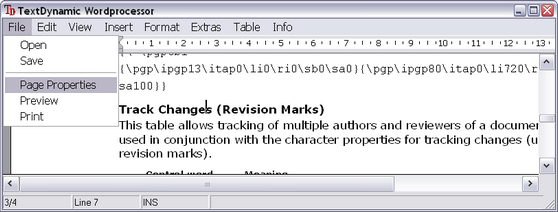
Now the statusbar shows useful information
![]()
We need at least load and save commands in the toolbar.
So we add 2 menu items with this code:
Private Sub Loadmenu_Click(ByVal sender As Object, ByVal e As EventArgs)
Me.wpdllInt1.wpaProcess("open", "")
End Sub
Private Sub SaveMenu_Click(ByVal sender As Object, ByVal e As EventArgs)
Me.wpdllInt1.wpaProcess("save", "")
End Sub
The method wpaProcess takes as parameter the name of a WPA action. Using this action names is the easiest possibility to execute standard commands. You can use the test application to test the available actions. Note that the actions are also used inside the XML description for the tool bar.
Note: PDF creation is always available (without license in unregistered mode).
Please try it out using: Me.wpdllInt1.wpaProcess("DiaExportToPDF","")
Please also see the interface PDFCreator, it contains the properties for the PDF creation.
The GUI definition file of TextDynamic contains the localization of the dialog strings and also action captions and hints. Some action names have been reserved to store the caption for menu drop downs only.
This enum definition can be used for code which creates a menu in code:
[Flags]
internal enum wpaMenuCaps
{
wpaDropDownMenuFile=1,
wpaDropDownMenuEdit=2,
wpaDropDownMenuView=4,
wpaDropDownMenuInsert=8,
wpaDropDownMenuFormat=16,
wpaDropDownMenuExtras=32,
wpaDropDownMenuData=64,
wpaDropDownMenuTable=128,
wpaDropDownMenuWindow=256,
wpaDropDownMenuInfo=512
}
Using this action names and a selection of the 'intelligent' actions you can create a framwork to create the menu of your form "on the fly".
We created a menu class which handles the update of the strings completely automatically.
You only need to to implement the IGetCurrEditor interface in your winform.
Public Class WinForm
Inherits Form
Implements IGetCurrEditor
...
Public Function CurrEdit() As WPDLLInt
Return Me.wpdllInt1
End Function
Now we create the procedure which initializes the menu.
The actions for each menu drop down are provided as string array. This makes this code easy to be updated (green lines).
Private Sub UpdateMenu(ByVal menu As MainMenu, ByVal selection As wpaMenuCaps)
Dim textArrayArray1 As String()() = New String()(10 - 1) {}
' FILE
textArrayArray1(0) = New String() { "DiaOpen", "DiaSave", "-", "DiaPagePropEx", "DiaPreview", "DiaPrint" }
' EDIT
textArrayArray1(1) = New String() { "undo", "redo", "-", "DiaFind", "DiaReplace", "-", "copy", "paste", "SelAll" }
' VIEW
textArrayArray1(2) = New String() { "DiaManageHeaderFooter", "ShowCR", "-", "LayoutNormal", "zoom100", "zoomwidth", "zoomfullpage", "zoomdoublepage" }
' INSERT
textArrayArray1(3) = New String() { "DiaINSGRAPHIC", "DiaINSSymbol", "DiaINSHyperlink", "DiaINSFields" }
' FORMAT
textArrayArray1(4) = New String() { "DiaParagraphProp", "DiaParagraphBorder", "DiaBulletOutlines" }
' EXTRAS
textArrayArray1(5) = New String() { "DiaSpellcheck", "DiaSpellOptions", "SpellAsYouGo" }
' DATA - reserved
Dim textArray8 As String() = New String(0 - 1) {}
textArrayArray1(6) = textArray8
' TABLE
textArrayArray1(7) = New String() { "DiaINSTable", "DiaParagraphBorder", "InsColBefore", "InsCol", "InsRowBefore", "InsRow" }
' WINDOW
Dim textArray10 As String() = New String(0 - 1) {}
textArrayArray1(8) = textArray10
' INFO
textArrayArray1(9) = New String() { "DiaWPAbout", "DiaWPDebug" }
Dim textArray1 As String() = New String() { "DropDownMenuFile", "DropDownMenuEdit", "DropDownMenuView", "DropDownMenuInsert", _
"DropDownMenuFormat", "DropDownMenuExtras", "DropDownMenuData", "DropDownMenuTable", "DropDownMenuWindow", "DropDownMenuInfo" }
Dim num1 As Integer = 0
Dim num2 As Integer = 1
Do While (num1 <= 10)
If ((selection And CType(num2, wpaMenuCaps)) = CType(num2, wpaMenuCaps)) Then
Dim item2 As New WPAMenuItem(Me, textArray1(num1))
Dim textArray13 As String() = textArrayArray1(num1)
Dim num3 As Integer = 0
Do While (num3 < textArray13.Length)
Dim text1 As String = textArray13(num3)
Dim item1 As New WPAMenuItem(Me, text1)
item2.MenuItems.Add(item1)
num3 += 1
Loop
item2.Update
menu.MenuItems.Add(item2)
End If
num1 += 1
num2 = (num2 * 2)
Loop
End Sub
After adding to event Form.Load - Initialize MainMenu
Me.mainMenu1.MenuItems.Clear ' Start from scratch!
Me.UpdateMenu(Me.mainMenu1,
(wpaMenuCaps.wpaDropDownMenuInfo Or
wpaMenuCaps.wpaDropDownMenuTable Or
wpaMenuCaps.wpaDropDownMenuExtras Or
wpaMenuCaps.wpaDropDownMenuFormat Or
wpaMenuCaps.wpaDropDownMenuInsert Or
wpaMenuCaps.wpaDropDownMenuView Or
wpaMenuCaps.wpaDropDownMenuEdit Or wpaMenuCaps.wpaDropDownMenuFile)
this is how the menu will look at runtime.